

Laravel Nova — Tips and Tricks


Laravel Nova — Tips and Tricks (Part 1)
I am a Laravel/ VueJS developer and over the last few months, I have been working on Laravel Nova and it has been a lot of fun developing the app with it for my new client. The client is a US Basketball legend and he is not quite the tech-savvy, but he was able to understand the overall UI that Nova provided and was quite happy with what was being delivered to him.

Laravel Nova has not only helped me quickly develop backends/admin panels for my clients but has also helped ease of understanding for my clients as they are pretty much self-explanatory. It makes communication so much easier between the developers and the clients. When a new feature is published, the clients know exactly where to look, if there is a bug, they know exactly what to communicate.
Having worked on Nova for the last few months, I have come across a few tips and tricks that I have used and implemented and I am documenting here, which may be helpful to other developers working on Laravel Nova.
So here it is…
Categorize Nova Classes into Separate Folders
Like Laravel Models are created within theapp folder, Nova creates resources within the app/Nova folder. Not really a fan of this, because it gets clumsy when the size of the project grows and you have a lot of resources. My recommendation is to create domain-specific folders inside the folder app/Nova and create resources within them. So you would use the following artisan command to create the Resource to add it to a specific folder.
php artisan nova:resource Account/Resources/Customers --model="App\Domains\Account\Models\Customer"</span>
You can pretty much do the same when creating
- Actions
- Dashboards
- Metrics
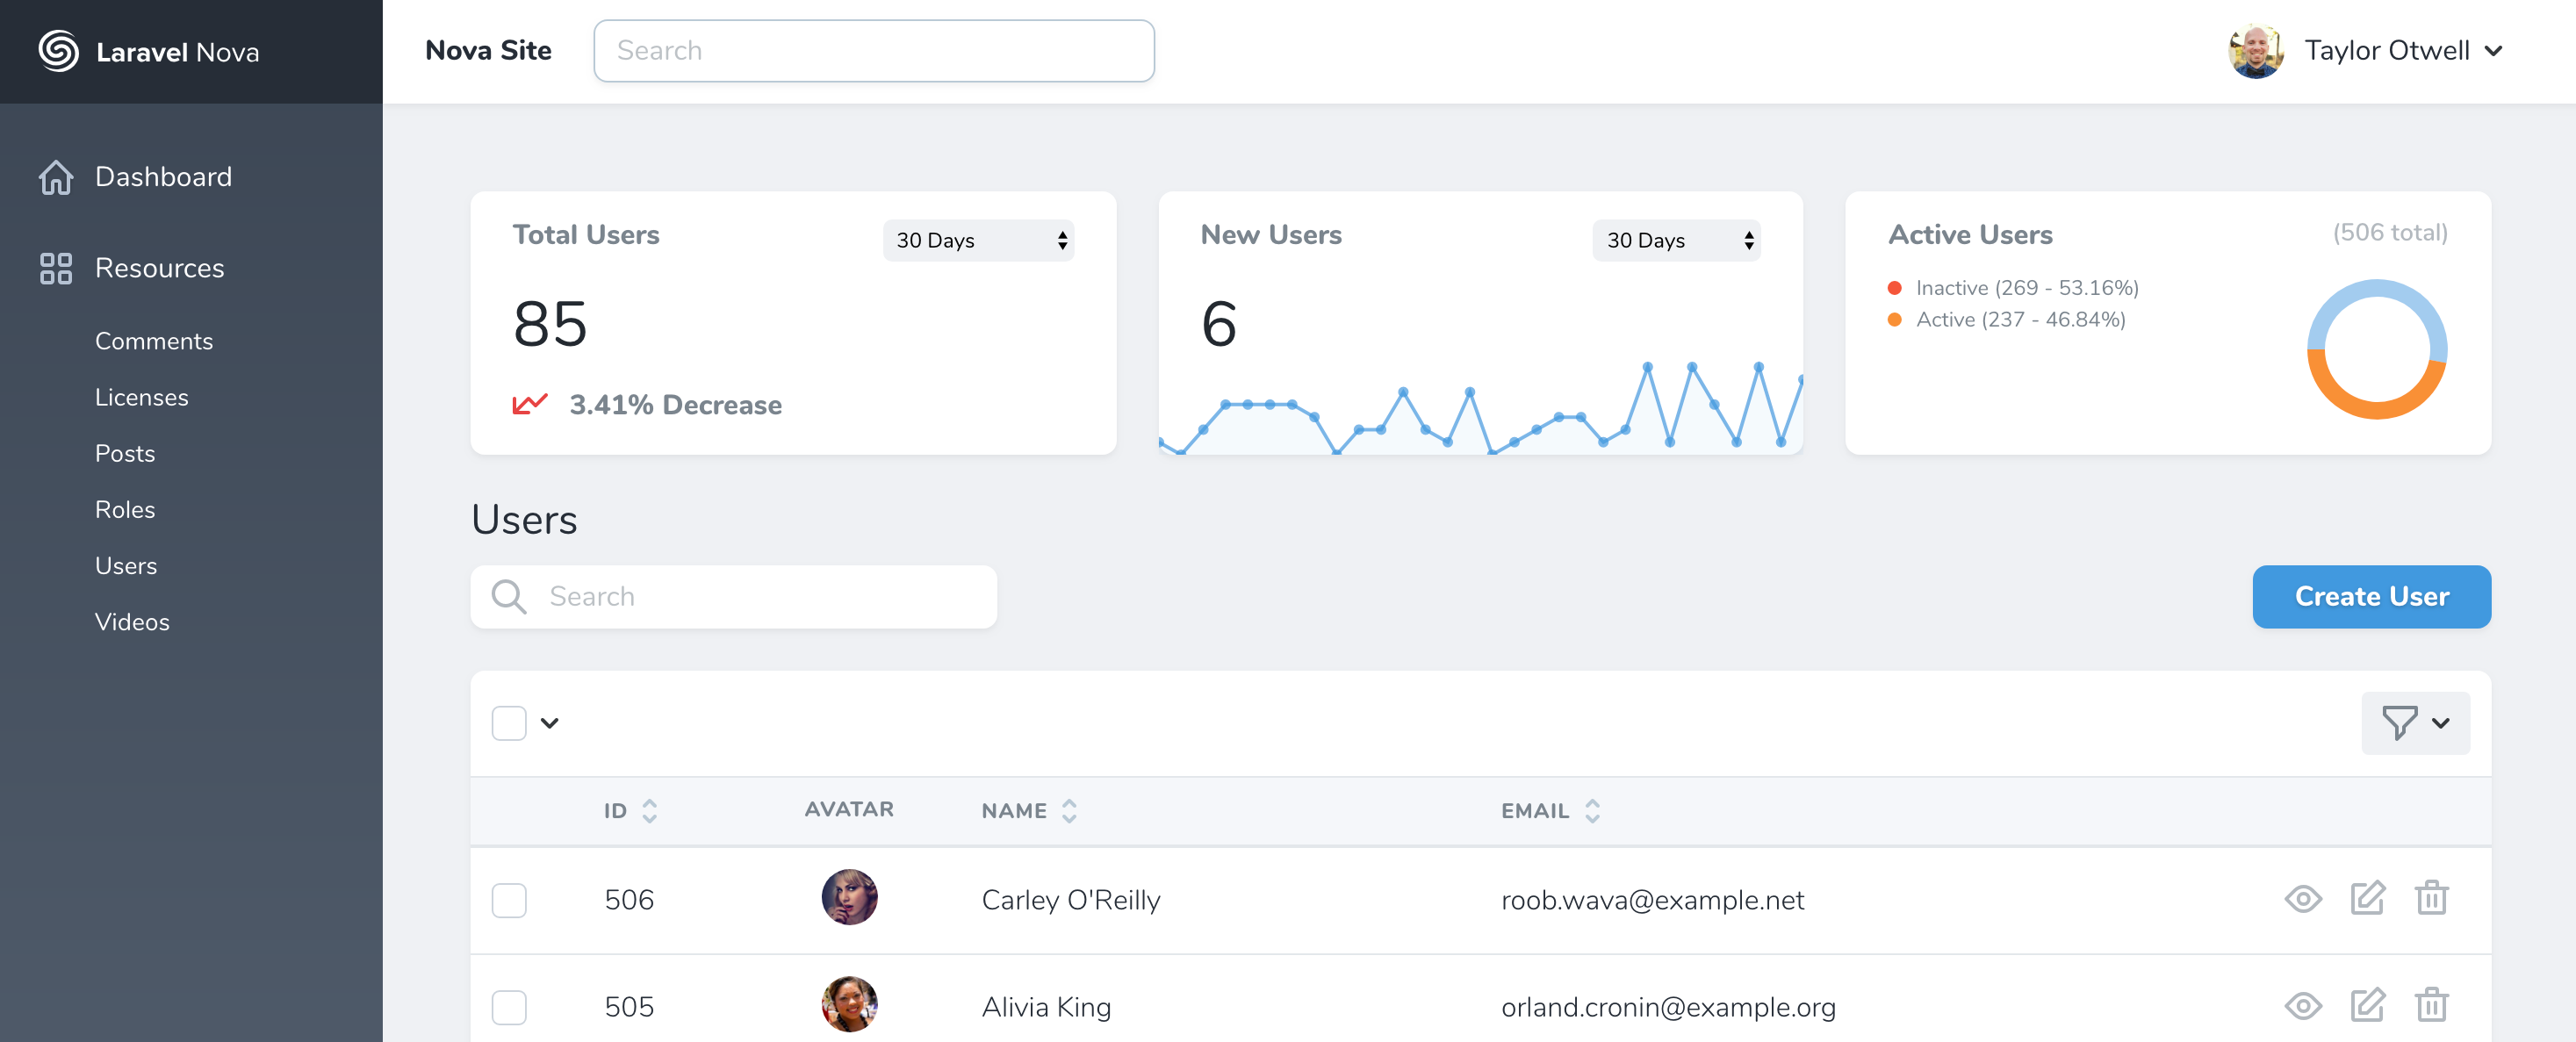
Categorizing your Resource on the left Sidebar
By default, Nova adds your Resource to a group calledOther.

Laravel Nova Default grouping
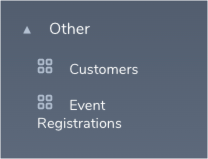
Laravel provides a way to group these resources into categories and makes a 2 level menu on the sidebar. The $group variable accepts a string and will take the title of the group name. You can have multiple resources with the same group name to add them under the same group in the left sidebar. Here is how it looks after you set the $group variable on the resource.

Grouping resources on the left sidebar
Hiding resources from the left sidebar
There are times where you want to hide a resource from the sidebar as they are available only as a HasOne or a HasMany relation and doesn’t need to really be on the sidebar.
The classLaravel\Nova\Resource that each Resource inherits has a variable $displayInNavigation which is by default set to true. This variable indicates if the Resource should be displayed on the sidebar or not. If you override this variable and set to false then the Resource is not shown on the left sidebar.
Hiding the resource from the left sidebar navigation
Changing the label displayed on the Resource
When creating a resource, Nova recommends naming the resource using the singular label similar to the naming convention for the Eloquent Models. So if you are creating a resource to display Customers you would do:
php artisan nova:resource Customer</span>
When you navigate to the resource, you would see that Nova automatically formats the label into a plural form from the class name. You will also notice that when you are on the detail page or the pages that allow creating or editing the resource, Nova shows the singular label of the resource. Basically Nova uses the String helpers to create the singular and plural form. There are times where the singular and plural form of the Resource doesn’t seem right and you want to update it, Nova offers to methods that one can override.
Changing the display label of a resource
Disabling Creating, Updating and Deleting resources
Let’s assume you have a Resource and the data in the underlying table always gets created through external data or events (For example, E-Mail Logs, Webhook Logs) and the data is only for viewing purposes and does not require Creating, Updating or deleting ever. So when you create a resource for this, Nova automatically shows the buttons to Create, Edit or Delete.
Nova recommends the use of Policies to disable these buttons which is great if you want to only disable/hide these buttons based on the User Authorization. but when you know that these buttons are never going to be used, there is a simpler way to hide them.
The class Laravel\Nova\Resource provides 3 methods, authroizedToCreate, authorizedToUpdate and authorizedToDelete. These 3 methods checks if the underlying model has a Policy attached and determines if the current user has the ability to create, update and delete the current resource and returns a boolean to hide/show the buttons.
You can override these 3 methods to return false to hide the buttons permanently instead of checking for the Policies. I added these 3 methods to a trait and use them in Resources that don’t need the Create, Update and Delete buttons. Here is the trait I have:
Similarly, you can add more restrictions by overriding methods:
authorizedToRestore— Determine if the current user can restore the given resource.authorizedToForceDelete— Determine if the current user can force delete the given resource.
If you still want to implement this using the recommendation by Nova, you can create a policy, add the methods create, update, delete, restore, forceDelete and return false on each of these methods.
Show the same field differently on different nova views
Let’s assume you have a multi-line description field (500 characters) on your resource that you want to show on your index view but you only want to show the first 100 characters of the description ending with “. . . .”.
The Nova field provides the functiondisplayUsing() that takes a callback to change the format in which it is displayed on the index and the detail view. So you can do:
That works perfect, but the problem with this is, the displayUsing effects both the index and the detail view, so when you viewing the resource item on the detail view, it would only show the first 100 characters with “. . . .” at the end.
So, to be able to show this formatting only on the index page you would use the method onlyOnIndex() on the field to show that field only on the index view. So this field will only show on the index field. Now to show the Description field on the rest of the views without the formatting you would create another field and use the methodhideFromIndex() to hide the field from the index view. So you would finally end up with 2 fields, one just for the index and the other for the rest of the views.
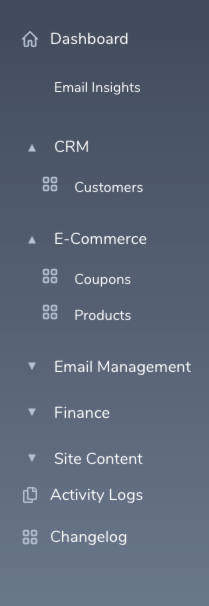
Hiding the default Nova Card and use your own Dashboard
Nova by default provides a default card when you log in to Nova. It provides quick help to Nova documentation for its different features.

Default Card/ Dashboard after authenticating into Laravel Nova
You can add your own metrics here instead of showing this to the user when they authenticate. To do this, you need to open the app/Providers/NovaServiceProvider.php and include your own metrics on the array returned on the method cards().
Navigating back to Parent Resource when a HasOne or HasMany Resource is created or updated.
So, you would have noticed that every time you create a HasOne or a HasMany relation, it redirects you back to the Child Resource’s detail page. So, if you have to come back to where you were (on the Parent Resource’s detail page) then you would have to hit the back button twice to get back to it. My client had the same problem and they filed it as a bug and wanted the behavior to be the same for almost all the places that had the option to create child resources.
After digging the Nova’s source-code, I identified that the classLaravel\Nova\Resource has 2 methods redirectAfterCreate and redirectAfterUpdate, these are the two methods that were redirecting whenever a resource is created or updated.
So I created a trait and overrode both these methods so, it can be included in all the Resources that are only created through Parent Resources and not directly. Here is the code on the trait.
So what this basically does is, when the create or update screens are loaded by Nova, they carry 2 query strings on the URL
viaResource— Indicates the parent resource for which the current item is being created.viaResourceId— Indicate the parent resource id for which the current item is being created.
Using these 2 query parameters, you override and return the URL to which the user should be redirected when the resource is created or updated.
I am hoping this is helpful to other developers working with Laravel Nova.
I will create more articles on Nova Tips and Tricks as I learn further.
Please do let me know if you come across any tips and tricks that may be helpful to others and I will update them. This being my first post, I am open to any recommendations and suggestions.